
Friday, 14 March 2014
Evaluation
For our evaluation, we decided to create a website, myself and Leah created the website with input from Emma. Click the link below to access it.

Thursday, 13 March 2014
Wednesday, 12 March 2014
Filming
We used two different locations to film in. This varied from an outside area in the woods (Bentley Priory) and the sixth form common room. These are two very different locations yet they fitted in with what we wanted to film.
 |
| Myself, Shannon, Leah and Emma. |
 |
| Myself, Shannon, Emma and Leah |
 |
| 6th form common room |
We chose Bentley Priory because it is a very horror like and fitted all of the horror conventions. There was a large wooded area that was good to film in as well as sections of dirty water. Bentley Priory had lots of wooded areas which was perfect for us as we planned to film key scenes in this environment. The areas we filmed in were very dull and eerie, this was a positive effect to have throughout our opening
The sixth form was the second location we chose to film in. We decided to use the common room because it is relatable for our target audience and fitted in with what we wanted to achieve. We chose the common room because it is set in a school and our characters are all students aged between 16-17 therefore it was the perfect place for use to film a scene for our opening horror titles.
Both of the locations we selected to film in were a great success because we got all of our filming done in the amount of time we had, the settings we filmed in look effective and will attract our target audience as well as the locations the acting itself went very well and as a group we are happy with the overall filming and the locations we selected. Myself and Emma had the job of doing a lot of the filming and ensuring that every shot we done was correct. Leah and Shannon took on the role of directing, this was to ensure we got all acting and filming done in the set time we had and got everything we needed to be filmed, filmed.
Both of the locations we selected to film in were a great success because we got all of our filming done in the amount of time we had, the settings we filmed in look effective and will attract our target audience as well as the locations the acting itself went very well and as a group we are happy with the overall filming and the locations we selected. Myself and Emma had the job of doing a lot of the filming and ensuring that every shot we done was correct. Leah and Shannon took on the role of directing, this was to ensure we got all acting and filming done in the set time we had and got everything we needed to be filmed, filmed.
Monday, 10 March 2014
Pre- Filming Activities

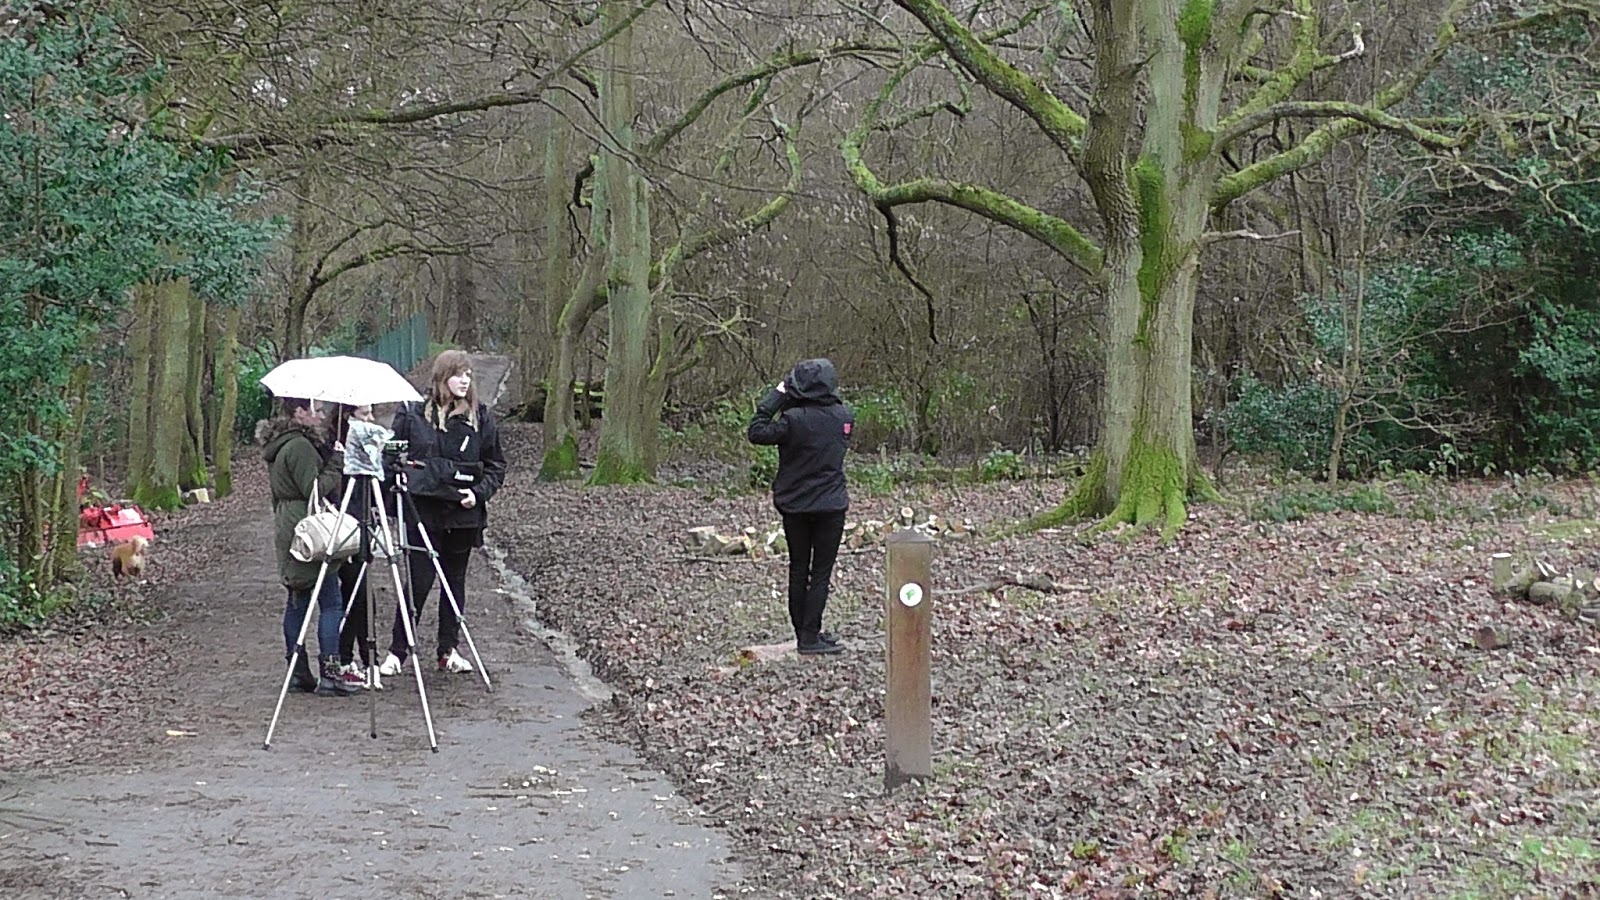
The following images are photos from our day we spent filming ( and some other time!) they are all photos of the footage we did not use in our final product.

When we went to Bentley Priory we had already decided and knew what we wanted to film and what we wanted to achieve, we spent the whole day filming all of the footage and we did get what we wanted. It was a very successful day and what we needed to get filmed we did.

However when we got back to school and uploaded all of the footage we realised that what we thought would be a good, strong opening horror titles, wasn't. We realised that what we had got was too much like a trailer and therefore, didn't fit the task we had been set to do and we had to rethink what we could do to change it and improve it.


We then had to rethink what we could do to make our horror better. We decided to use some of our footage we took at Bentley Priory at the beginning of our two minute opening. We then chose to film in our school because it would work well with our idea because our main characters are teenagers and still in school.

We filmed in our school and we did get filmed what we needed to get done, but then we had the same problem and the filming was not correct and did not look right, so we had to think again about what we could do to complete our two minute opening.


We finally decided to move where we filmed into the sixth form common room, this went really well and we got everything filmed in the space of two hours. We used the footage from the common room in our final horror opening.
As a result of filming, I think that, although we had bit of a hard time when it came to our footage, I think what we got looks great and really fits in with the horror conventions seen in real horror films.

Sunday, 9 March 2014
Health and Safety form
Below I have put the health and safety form we needed to fill out before we went out and filmed our horror film opening.
Risk assesment from FernDuggan
The health and safety form was completed by myself and Leah. We worked together and decided what and where the hazards would be at Bentley Priory. We then had to say what could happen to us in different situations we could be getting into whilst filming. We stated who was at risk, and what we could do to prevent the incident from happening. After completing the other columns we had to say what we think the risk rating would be. By doing this we were more aware of our surroundings and what the dangers were going to be.
The health and safety form was completed by myself and Leah. We worked together and decided what and where the hazards would be at Bentley Priory. We then had to say what could happen to us in different situations we could be getting into whilst filming. We stated who was at risk, and what we could do to prevent the incident from happening. After completing the other columns we had to say what we think the risk rating would be. By doing this we were more aware of our surroundings and what the dangers were going to be.
Friday, 7 March 2014
Costume
For our horror film opening, we had to choose costumes for each of our characters to fit their age and wear what a conventional teenager would wear. All of our characters were in their teens (17). My character was called Charlotte, I wore a pink and black blouse with a cardigan and black jeans with red converse. What I decided to wear is quite popular as most teenagers are either at sixth form or college and therefore wearing smart clothes represents this.
Skye, played by Leah was also a 17 year old victim of the killer. Leah decided to wear a green coat, leggings and white converse. This is a very popular look for teenagers at the moment so this fitted well with the character Leah was portraying.
 |
| Fern's Costume |
 |
| Leah's Costume |
Finally, there is Laura played by Shannon, Laura is Skye's best friend and they are very close, Laura wants to ensure that Skye is safe and warns her about the latest disappearances that have been occurring. Her costume is what a conventinal teenage girl would wear. The scene that this is worn in is set at school and therefore shows that she is in sixth form.
 |
| Shannon's costume |
Thursday, 6 March 2014
Horror film opening - filming
For our two minute opening of our horror film we went and filmed at Bentley Priory, we chose Bentley Priory because it lots of different sections that we could use to film. There was a big river that was in the centre that was surrounded by trees which gave it an eerie feel. There was also a huge area that was canopied by trees, this was effective because it didn't let all the light in so there was a sense it was early evening.
![]()


 As a group we got on really well when we were filming, we worked off each others ideas and got all the filming we needed to be done, done. before we started filming we decided on where about we were going to film in Bentley Priory. then we got on with the filming.
When we started filming we decided to film the scenes where we could see the full body first because it was very likely we would get muddy throughout the day. We started off by filming my scene where I am running away from the 'Killer' this was a long shot so my whole body was seen. We decided to film the scenes where we would have to be in the mud last because we would get very dirty in these scenes and we didn't want to look dirty in the earlier scenes where we were walking on the pavements.
We spent all day in the pouring rain filming our horror opening, we finally completed it after three hours of filming we had got all of our footage and had finished filming. Now all we had to do was edit all of our footage and put together our opening horror films.
As you can see from the images of Bentley Priory above, it was a very spooky, yet perfect location to film a horror film. When we went it was raining all day, this did not cause a problem for us though, because it just added an extra effect of eeriness. However the only downside of the constant rain we had that day, is the mud, this prevented us from filming on the grass because it was dangerous and slippery. The location we filmed at was the perfect place for us, the weather actually had an impact on our horror film surroundings.
When we started filming we decided to film the scenes where we could see the full body first because it was very likely we would get muddy throughout the day. We started off by filming my scene where I am running away from the 'Killer' this was a long shot so my whole body was seen. We decided to film the scenes where we would have to be in the mud last because we would get very dirty in these scenes and we didn't want to look dirty in the earlier scenes where we were walking on the pavements.
We spent all day in the pouring rain filming our horror opening, we finally completed it after three hours of filming we had got all of our footage and had finished filming. Now all we had to do was edit all of our footage and put together our opening horror films.
Monday, 24 February 2014
Research and Planning
Before we could go out and film, we had to plan what we were going to do, this involved creating a shot list of the different angles and camera shots we were going to use. We also created a script of which we had to follow to make shooting a success. By doing this it really helped us to plan what we were going to achieve when we went out filming.
We did find the story boarding and shotlisting quite difficult because it needed to be accurate and we didnt want to be changing what we had already wrote down. On the shot list we also wrote down how long we wanted to spend filming each different shot.
Script: Leah
Shotlist: Emma
Storyboard: Leah
Below is the Script.
Finally the Storyboard, this was completed by Leah, on the storyboard we stated what was going to happen in each shot.
We did find the story boarding and shotlisting quite difficult because it needed to be accurate and we didnt want to be changing what we had already wrote down. On the shot list we also wrote down how long we wanted to spend filming each different shot.
Script: Leah
Shotlist: Emma
Storyboard: Leah
Below is the Script.
This is the Shotlist, this was completed by Emma. On the shot list we had to write all the different camera shots and angles.
Shot list from FernDuggan
Finally the Storyboard, this was completed by Leah, on the storyboard we stated what was going to happen in each shot.
Storyboard from FernDuggan
Sunday, 23 February 2014
Our horror film Ident
This is our ident we created and made for our horror film opening, this was made by Emma on final cut pro using a template on the programme, whilst Emma was editing as a group we decided on the colours and music we wanted to use within the ident. We are happy with how our ident turned out as we feel its fluent and eye catching to our target audience.
As a group we chose to use the colours red and black because these are well known colours to be used for titles in horror films. I researched the music we could use and came across this piece called 'Russian Milk' I felt it sounded different yet it caused was freaky. There was a lot of different music we liked but this one was the one we felt looked and sounded best as it flowed well with our ident. In our original plan we decided on the name 'elfs productions' for our ident name but then we thought that it didn't fit the whole concept of it being a horror film so we decided to flip the name and use 'self productions'. Our horror ident is a total of 13 seconds long and we are using it at the very start of our 2 minute horror film opening. As a result of our ident, I think my group are happy with how it turned out.
As a group we chose to use the colours red and black because these are well known colours to be used for titles in horror films. I researched the music we could use and came across this piece called 'Russian Milk' I felt it sounded different yet it caused was freaky. There was a lot of different music we liked but this one was the one we felt looked and sounded best as it flowed well with our ident. In our original plan we decided on the name 'elfs productions' for our ident name but then we thought that it didn't fit the whole concept of it being a horror film so we decided to flip the name and use 'self productions'. Our horror ident is a total of 13 seconds long and we are using it at the very start of our 2 minute horror film opening. As a result of our ident, I think my group are happy with how it turned out.
Monday, 27 January 2014
Idents
What is an Ident?
An ident is what we identify things by. In the film industry, we use idents to recognise what company the film was made an example of an ident is 'Dreamworks'. Every company has a different ident that we all know and will recognise when we see it. Different fonts, camera angles, images and sounds are all part of an ident.
Lionsgate -
The following Ident is 'Lionsgate' (2013) and it is 23 seconds long. The Lionsgate ident changes a lot and gets updated so the graphics, sounds and fonts look better. The ident shows what looks like the world, the quickly skims over space with clouds and stars scattered all over the place with the music building up more and more tension. The movement is very quick as the viewer speeds backwards at a very fast pace to reveal the word 'Lionsgate' that appears through the clouds. It finishes with the word 'Lionsgate' very bold with a bright light behind it shining brightly. When the 'Lionsgate' title comes into the picture, everything slows down and goes at a slower pace so all focus is turned to the name of the company.
Intention - The amount of darkness and eeriness that is being created throughout the ident may suggest that there is going to be a lot of tension and power throughout the film. The ident itself is very powerful and bold, especially the font. The way that the music is in the background also influences that they are a strong company. The music is very strong and powerful and the instrumnets range from trumpets to drums that gradually get louder and end with a powerful note.
Lionsgate is known to be used for many horror films and therefore this ident can help me with my own ident for my horror film I am making because of the way it looks and the type of music and fonts used.
Many film companies update their idents as the years go by and they become more succsessful as film companies and the graphics improve. Lionsgate has improved their ident many times, the latest ident being the one I have embedded above (2013).
The ident below is the first ever ident that was used for Lionsgate, this was made in 1999.
This ident is very different from the latest one. It is not very intriguing and the music used is very simple. The music is building up to the image of the lion being made by streaks of light. After the lion has appeared, slowly, in a bright, gold, eyecatching font the title of the company, 'Lions Gate Films' comes into veiw.
In comparison to the 2013 ident, the 1999 one really is quite plain and boring. Theres not much movement occuring on screen and the music gradually gets louder and then just stops leaving the title and lion. The graphics are very poor compared to the 2013 one with the dark blue sky and stars revealing the bold and eye catching 'Lionsgate' ident.
Walt Disney-
The above ident I have emended is the original Walt Disney ident. It is very plain but easily can catch the attention of potential audiences. It starts off with the Disney castle slowly being formed, starting from the top with a gentle twinkling sound in the background gradually getting louder as more of the castle is revealed. There is then a big beam of light coming from the front of the castle which then reveals the title in swirly letters 'Walt Disney' in white with 'Pictures' written underneath in a toned down font. A star then shoots over the top of the castle leaving a trail behind it. The music slows down and ends with a flute sound.
Walt Disney is a very popular and well known ident by people all around the world of all different ages. Disney realesed their first film in the early 50's and has had many, many more films since, each time the graphics improving. Disney is a very popular film company.
The ident for Disney is very popular and therefore has not been altered or changed much. But the most recent ident is very different compared to the classic ident. there is more going on in the latest ident.
In the ident I have embedded above it starts with a clear night sky and the camera slowly moves down through the clouds whilst there is a gentle ringing of chimes that slowly turns into a burst of violins and various other instruments leading up to a river, that is flowing behind the Disney castle. We see the flag at the top of the castle first whilst the camera is zooming out we see more of the castle , there is an array of fireworks behind the castle, whilst the fireworks are being shown behind the castle, the front of the well lit castle comes in to view. The music slows down and becomes calmer, then a bright shooting star zooms over the top of the Disney castle leaving a trail of sparkles. When the star reaches the other side of the castle, the words ' Walt Disney ' appear in a bright, clear, swirly font. The ident ends with a perfect view of the castle and 'Walt Disney' written in front whilst triumphant music is being played.
An ident is what we identify things by. In the film industry, we use idents to recognise what company the film was made an example of an ident is 'Dreamworks'. Every company has a different ident that we all know and will recognise when we see it. Different fonts, camera angles, images and sounds are all part of an ident.
Lionsgate -
The following Ident is 'Lionsgate' (2013) and it is 23 seconds long. The Lionsgate ident changes a lot and gets updated so the graphics, sounds and fonts look better. The ident shows what looks like the world, the quickly skims over space with clouds and stars scattered all over the place with the music building up more and more tension. The movement is very quick as the viewer speeds backwards at a very fast pace to reveal the word 'Lionsgate' that appears through the clouds. It finishes with the word 'Lionsgate' very bold with a bright light behind it shining brightly. When the 'Lionsgate' title comes into the picture, everything slows down and goes at a slower pace so all focus is turned to the name of the company.
Intention - The amount of darkness and eeriness that is being created throughout the ident may suggest that there is going to be a lot of tension and power throughout the film. The ident itself is very powerful and bold, especially the font. The way that the music is in the background also influences that they are a strong company. The music is very strong and powerful and the instrumnets range from trumpets to drums that gradually get louder and end with a powerful note.
Lionsgate is known to be used for many horror films and therefore this ident can help me with my own ident for my horror film I am making because of the way it looks and the type of music and fonts used.
Many film companies update their idents as the years go by and they become more succsessful as film companies and the graphics improve. Lionsgate has improved their ident many times, the latest ident being the one I have embedded above (2013).
The ident below is the first ever ident that was used for Lionsgate, this was made in 1999.
This ident is very different from the latest one. It is not very intriguing and the music used is very simple. The music is building up to the image of the lion being made by streaks of light. After the lion has appeared, slowly, in a bright, gold, eyecatching font the title of the company, 'Lions Gate Films' comes into veiw.
In comparison to the 2013 ident, the 1999 one really is quite plain and boring. Theres not much movement occuring on screen and the music gradually gets louder and then just stops leaving the title and lion. The graphics are very poor compared to the 2013 one with the dark blue sky and stars revealing the bold and eye catching 'Lionsgate' ident.
Walt Disney-
The above ident I have emended is the original Walt Disney ident. It is very plain but easily can catch the attention of potential audiences. It starts off with the Disney castle slowly being formed, starting from the top with a gentle twinkling sound in the background gradually getting louder as more of the castle is revealed. There is then a big beam of light coming from the front of the castle which then reveals the title in swirly letters 'Walt Disney' in white with 'Pictures' written underneath in a toned down font. A star then shoots over the top of the castle leaving a trail behind it. The music slows down and ends with a flute sound.
Walt Disney is a very popular and well known ident by people all around the world of all different ages. Disney realesed their first film in the early 50's and has had many, many more films since, each time the graphics improving. Disney is a very popular film company.
The ident for Disney is very popular and therefore has not been altered or changed much. But the most recent ident is very different compared to the classic ident. there is more going on in the latest ident.
In the ident I have embedded above it starts with a clear night sky and the camera slowly moves down through the clouds whilst there is a gentle ringing of chimes that slowly turns into a burst of violins and various other instruments leading up to a river, that is flowing behind the Disney castle. We see the flag at the top of the castle first whilst the camera is zooming out we see more of the castle , there is an array of fireworks behind the castle, whilst the fireworks are being shown behind the castle, the front of the well lit castle comes in to view. The music slows down and becomes calmer, then a bright shooting star zooms over the top of the Disney castle leaving a trail of sparkles. When the star reaches the other side of the castle, the words ' Walt Disney ' appear in a bright, clear, swirly font. The ident ends with a perfect view of the castle and 'Walt Disney' written in front whilst triumphant music is being played.
Tuesday, 14 January 2014
Horror Film Step Outline
For this task I had to watch two different horror film openings (which only consisted of watching the first two minutes) and analyse everything that happens within that period of time. I had to write about the timings, sound, mise-en-scene, typology and editing. I found this challenge quite challenging because I had to keep stopping the film and writing down all the details about it and I found writing everything down difficult. I found Sweeney Todd easier because was a full two minutes and there was a lot going on that I could write about. However I found Cabin In The Woods more challenging because the opening titles only consisted of 59 seconds. By watching these film titles I saw how they are made to be freaky and scare the audience to draw them in. On both film titles I noticed that eerie music is played constantly to create tension - instruments such as drums and violins were used. Often sound effects were played suddenly, such as thunder and lightening sounds. I think by using music creates an effect and makes the titles more interesting and intriguing to an audience. I went on 'Artofthetitles.com' to get the openings of both films.
However this task did help myself and my group to develop our ideas for our own opening horror titles. We each watched different opening titles to different horror films, this way we each had more ideas to use on our own opening horror titles. As a group we all noticed that most opening titles had a bold red font stating what the movie was called, this is because red represents danger, blood and mystery so the use of red font would fit in with our own film titles.
However this task did help myself and my group to develop our ideas for our own opening horror titles. We each watched different opening titles to different horror films, this way we each had more ideas to use on our own opening horror titles. As a group we all noticed that most opening titles had a bold red font stating what the movie was called, this is because red represents danger, blood and mystery so the use of red font would fit in with our own film titles.
Sunday, 12 January 2014
Film pitch, Padlet and Ammendments
In our group we had to write down a detailed plan of our horror film, we had to include: The title, log line, sub genre, a detailed synopsis and resources we need. To start off with we had to think of a title for our horror film. We came up with the idea of having an internet related title as our horror is internet based. We decided on the name 'into-net' for our horror film. Next we had to say what our subgenre is and ours is a psychological based genre. We had to think up a logline but we had to think about this so we left it blank for the first part. It consists of a 'killer' who hunts teenage girls down on the popular networking site 'Facebook' they arrange to meet and he then tortures them. We next had to write a detailed synopsis of the beginning, middle and end of our film, we found this quite challenging because we hadn't thought through every single thing that was going to happen throughout our horror. We had to then go on to write about all the resources we needed to make filming our horror successful.
After we completed our pitch we created a padlet so our peers could read what our horror film is going to be about, where we are filming it and all our ideas. After they had read this they would of commented a what they liked about our film idea and what they thought we could improve on. After everyone had written what they liked and what they thought we could improve on we looked at what everyone had said. See our padlet below.
After looking at the comments we went back to our film pitch to improve it. We made sure that our synopsis was clearer and more detailed, we also explained the reason why all these things are happening. I enjoyed this task because as a group we all really thought in depth about our horror film and how we are going to bring it all together and why things will happen. I did find thinking of a detailed synopsis challenging as well as thinking of a log line. But I really did enjoy doing this task.
After looking at the comments we went back to our film pitch to improve it. We made sure that our synopsis was clearer and more detailed, we also explained the reason why all these things are happening. I enjoyed this task because as a group we all really thought in depth about our horror film and how we are going to bring it all together and why things will happen. I did find thinking of a detailed synopsis challenging as well as thinking of a log line. But I really did enjoy doing this task.
Into net from FernDuggan
Friday, 10 January 2014
Target Audience Questionnaire With Analysis Of Results
The link below is our survey we created to ask people around us what they
thought about horror films.
https://www.surveymonkey.com/s/RY2W6NP
We asked a total of ten different questions relating to horror films, the reason we asked these questions was for us to take the information we got and input it into our own horror movie we are creating. When we analysed the results we realised that we would have to make some adjustments to some of our ideas for our horror movie opening to make an audience more attracted. We asked questions such as 'What type of horror antagonist do you like the most?' The answers we received did have an affect on our ideas.
Below is a sound recorded analysis of the results, we assigned everyone a question to answer for us to record to put in when we are editing. We recorded the screen by using quick time, then we used final cut pro to put everything together. This was edited by myself and Emma.
https://www.surveymonkey.com/s/RY2W6NP
We asked a total of ten different questions relating to horror films, the reason we asked these questions was for us to take the information we got and input it into our own horror movie we are creating. When we analysed the results we realised that we would have to make some adjustments to some of our ideas for our horror movie opening to make an audience more attracted. We asked questions such as 'What type of horror antagonist do you like the most?' The answers we received did have an affect on our ideas.
Below is a sound recorded analysis of the results, we assigned everyone a question to answer for us to record to put in when we are editing. We recorded the screen by using quick time, then we used final cut pro to put everything together. This was edited by myself and Emma.
Thursday, 12 December 2013
Horror Genre Research
Below you will see our timeline of horror films, Shannon and myself researched all the horror movies and how they have developed over the years. We decided which horror films we wanted to add to our timeline, we wanted to do horror films that people would know about and would have watched. Our timeline ranges from the year 1910 all the way to the present year, 2013. By creating a timeline I learnt about how horror films have improved a lot since 1910, especially the graphics.We created the following timeline on Dipity.
If you wish to view our timeline all the way to 2013, please click on 'view on dipity' in the top right hand corner.
When doing research we also created a prezi, Emma created this and the Prezi is about horror iconography. Throughout the Prezi there are different catogeries showing horror iconography. We found out about the different settings, weapons, locations and objects. I found out all the different weapons that different horror films use and the different locations they use to create the tension for the audience.
We also researched the different sub-genres of different horror films and who they appeal to and what is included in them. We researched Comedy Horror, Science fiction, supernatural Horror, Psychological Horror, Gothic horror and Slasher horror. When researching all of the different sub genres I learnt what is included in different sub - genres and how they attract different audiences.
Finally myself and Leah researched certificate ratings and what they mean for different films. We researched the U, PG, 12A, 12, 15 and 18 ratings and discovered why different types of films have those certificate ratings. For example many 18 films contain a lot of gore and strong language as well as sex references.
When doing research we also created a prezi, Emma created this and the Prezi is about horror iconography. Throughout the Prezi there are different catogeries showing horror iconography. We found out about the different settings, weapons, locations and objects. I found out all the different weapons that different horror films use and the different locations they use to create the tension for the audience.
We also researched the different sub-genres of different horror films and who they appeal to and what is included in them. We researched Comedy Horror, Science fiction, supernatural Horror, Psychological Horror, Gothic horror and Slasher horror. When researching all of the different sub genres I learnt what is included in different sub - genres and how they attract different audiences.
Subgenres from FernDuggan
Finally myself and Leah researched certificate ratings and what they mean for different films. We researched the U, PG, 12A, 12, 15 and 18 ratings and discovered why different types of films have those certificate ratings. For example many 18 films contain a lot of gore and strong language as well as sex references.
Monday, 2 December 2013
Preliminary Task Evaluation
This evaluation was created on GoAnimate and throughout this evaluation clip we covered what we included in our preliminary task and we included examples of when we used it. We talked about how we thought our overall preliminary task went. This was created by myself and Leah.
This is another evaluation video also made on Goanimate made by Shannon and Emma. In this video we explained how we used the different media conventions and the media language. We also talked about how teenagers can be stereotyped and we explained how we used miss-en-scene.
Tuesday, 19 November 2013
Preliminary task
This is our preliminary task it includes Match on Action, 180 Degree Rule and Shot reverse shot. We decided to make our scenario a student going into a detention. I am playing the role of the teacher and Shannon is playing the role of the student who is going into the detention, she has an attitude problem and causes a lot of fuss over nothing. Emma was another student who came into the detention late. To start this task off we all wrote the script together deciding on what camera angle we wanted that part of the script filmed at. Leah filmed the preliminary task ensuring that all of the key shots that were inteded to be used are involved.
Tuesday, 15 October 2013
Match On Action
The Activity
Match on action is a filming technique that is used to show two different shots in a scene but both shots match the action and pace of the first shot. This shows continuity throughout the whole scene. The activity we were given was a scenario and we had to decide where the best place to put the cameras would be. Our scenario was to 'walk through a door' we put the cameras in two different places, both sides of the door. One was to the side of the character when she was going through the door and the other camera was placed the other side of the door so we could see the character come through the door.
Evaluation
The simplest part of the activity was editing our video because there was only two different shots and they were very short so there was not much to cut and get rid off. The scenario we got given was somebody walking through a door. We had to make sure our video looked as realistic as possible, therefore, when editing we had to make sure that it flowed fluently.
The most challenging part of the activity was the camera angles, this was because we had to make sure we put the cameras in the correct angle so that you didn't see anything other than the character and the door. We had to make sure the other camera wasn't in view because this could make our clip look unprofessional. We kept checking to make sure that both cameras were in the correct angle and you couldn't see either cameras.
The positioning of the camera was important because we needed to ensure that we filmed all the correct parts; For Leah walking through the door we positioned one of the cameras behind her so we could see both her and the door. We positioned the other camera on the other side of the door so we could see her coming through the door and walking past. I think we positioned the cameras quite well.
If I was to be more critical of my work I would slightly change the camera angle so that we get everything we need in the frame.
Match on action is a filming technique that is used to show two different shots in a scene but both shots match the action and pace of the first shot. This shows continuity throughout the whole scene. The activity we were given was a scenario and we had to decide where the best place to put the cameras would be. Our scenario was to 'walk through a door' we put the cameras in two different places, both sides of the door. One was to the side of the character when she was going through the door and the other camera was placed the other side of the door so we could see the character come through the door.
Evaluation
The simplest part of the activity was editing our video because there was only two different shots and they were very short so there was not much to cut and get rid off. The scenario we got given was somebody walking through a door. We had to make sure our video looked as realistic as possible, therefore, when editing we had to make sure that it flowed fluently.
The most challenging part of the activity was the camera angles, this was because we had to make sure we put the cameras in the correct angle so that you didn't see anything other than the character and the door. We had to make sure the other camera wasn't in view because this could make our clip look unprofessional. We kept checking to make sure that both cameras were in the correct angle and you couldn't see either cameras.
The positioning of the camera was important because we needed to ensure that we filmed all the correct parts; For Leah walking through the door we positioned one of the cameras behind her so we could see both her and the door. We positioned the other camera on the other side of the door so we could see her coming through the door and walking past. I think we positioned the cameras quite well.
If I was to be more critical of my work I would slightly change the camera angle so that we get everything we need in the frame.
Tuesday, 1 October 2013
Demonstrating 180 degree rule and shot reverse shot
For this activity we worked in groups and we had to make a short video using the 180 degree rule. The activity was for us to experimenting using the 180 degree rule. The 180 degree rule is film technique where one character is talking to another and the camera stays at one side of both characters because of an imaginary line called the axis. In our video I was opposite Shannon and we showed the 180 degree rule by keeping the camera the same side and when it was my turn to talk the camera would be over Shannons shoulder so the audience can see me whilst I talk and the same thing happened when Shannon was talking but the camera was over my shoulder.
Shot reverse shot is another film technique where one character is shown talking to another character and the other character is shown looking back at the first character.
In this activity my role was being in the video in the conversation and I wrote the script that we used, we all decided to have our short video about a 'romantic dinner date' and I wrote the script using ideas from other members of my group. After I finished writing the script we went and filmed it and myself and Shannon played the two characters that were on a date.
After we finished editing our video we had to assess ourselves and grade ourselves based on what we completed for the activity. We graded ourselves as an B1, we looked through all of the criteria and reflected back onto what we had done and anything we did and didn't do. We ensured that the we had good control of the camera by making sure it was not shaking when we were filming, we decided to put the camera on a tripod so that it would be at a certain angle and we wouldn't have to worry about it being shaken. I think our framing was ok, because we were both sitting opposite sides of a table so we filmed all of mine first and then went on to Shannon, if we both sat in the same place then when we edited it, it would look like we were both sitting in exactly the same place and this would look odd. So by sitting in different places it looked like we were on a dinner date and the framing shows the relationship between the two characters. We did not really think about miss-en-scene, we mainly thought about the script and how we were going to film it, however we did place the two characters either side of a table to make it look like they were on a date.
We could improve on our eye line there was between the two characters by ensuring that the angle was in the same place for both characters and not closer to one character than the other. When we next have to do an activity like this I will have more thought about where we will be setting the video and where the camera is placed.
As well as assessing ourselves we also got peer - assessed by another group and they said that our editing and our video over all was good, they graded us a B1/A3, they also said that our conversation flowed well and we demonstrated shot reverse shot well.
We edited our video by using iMovie, this really helped our whole video come together because we filmed each frame separately (One character said one sentence, we stopped filming, then filmed the other characters response etc) once we finished we uploaded all clips on to iMovie and put it all together. Our final video was successful because we put all the clips in the correct order and the conversation flowed steadily. This would make the meaning apparent to the audience because of the setting and how the characters were speaking it set of the impression that there was a date occurring.
We demonstrated the 180 degree rule effectively because we stayed on one side of both characters and we positioned the camera in the correct place.
I would improve the footage we have by making sure that both characters are looking at each other so when it comes to editing it looks more effective. I also need to ensure that the camera is positioned at the same height and angle for both characters and isn't closer to one character and further away from the other.
Monday, 30 September 2013
storyboard
In class we had to make a storyboard based round a stimulus we got given by our teacher. The
stimulus I recieved, was the movie Taken. We had template of a story board we had to fill in by drawings of different camera shots and angles. We done the key scenes of the film as we thought these would be most effective and creative for us to make. After we filmed the story boards, we got a camera and acted out each scene we drew on the storyboard using the camera shots and angles.
stimulus I recieved, was the movie Taken. We had template of a story board we had to fill in by drawings of different camera shots and angles. We done the key scenes of the film as we thought these would be most effective and creative for us to make. After we filmed the story boards, we got a camera and acted out each scene we drew on the storyboard using the camera shots and angles.
Wednesday, 11 September 2013
Introduction to my blog
My name is Fern Duggan
My candidate number is 9234
I go to Swakeleys School 6th form
The reason I am producing this blog is for evidence for my foundation portfolio. I didn't do media studies for GCSE, however I am taking it now because it looks like an interesting subject that i will enjoy. I am interested to see how the media works and I am also looking forward to making videos, editing them and making them look good! By doing media, I think it would be a good influence on my plans for the future as I am considering a career in the world of performing arts. Whilst I am doing my AS, I will be creating a horror film opening.
Subscribe to:
Posts (Atom)